
Work began with masking the slot with 3M painter's tape. This product is low tack, yet forms a good seal. This kept excess filler from fouling the hull's rivet detail.

A course grit sanding stick was then used to scuff up the slot to promote adhesion of the filler. These sticks are a great way to get in the many nooks and crannies of the Nautilus -- places a sanding block, or paper, can't go. The dust was blown out to make sure the slot was clean.

The filler used was a new product (to me): Evercoat Metal Glaze. It is a quick drying automotive grade filler recommended by Dave Merriman of subpirates.com. I tracked down a quart kit at a Sherwin Williams automotive paint store.

The two part filler was mixed in small batches and poured into each slot. When using Evercoat, mix small amounts at a time as the the product catalyzes quickly. My very first batch hardened in mid pour. I had to scrape off the material on the boat. The mixing directions on the product are vague. I reduced the catalyst in successive batches and the material worked fine. Experiment with small amounts before applying it to a model. A little bit of catalyst goes a long way.

The cured filler proved to be extremely hard, yet very workable. Adhesion was excellent. A drill bit from the inside of the hull opened up the hole for the dive plane shaft bearing. Pealing off the tape yielded crisp edges on the filled areas.
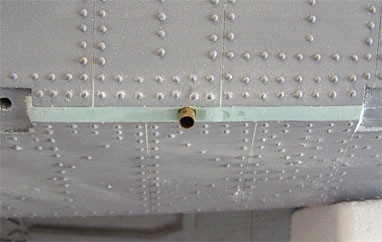
A metal file and sanding block were used to take the filled areas down flush to the hull seams. 3M tape went over the rivet heads during this process to prevent damage. The result was a nice filled hull panel requiring minimal spot puttying for a perfectly smooth finish. Once the shaft bearing is permenantly installed, I will touch this up and hit it with primer.


0 comments:
Post a Comment